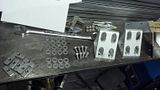
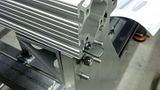
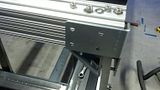
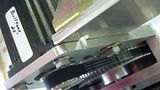
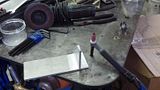
Apocalypse Fabrication Onto the gantry install! We reviewed the stock photo and YouTube again to determine which side the torch goes onto the gantry. Also to determine which way the rack teeth were oriented. The instructions tell to install the 45 degree gussets onto the side plates. I don’t know that this is the best way to approach this. It is VERY IMPORTANT to NOT tighten anything on the gantry until everything is finger tight. Trust me, we spent more time unscrewing bolts to line up new pieces than I care to mention. After putting this damn gantry together more times than I can count…. I would suggest flipping the gantry over on the bench and installing all the nutsert plates into the channel, since they probably fell out during shipping like mine. If you don’t do this first… you are gonna be pissed that you have to take the gantry back off again to install the nutserts for the cable carrier brackets. The carrier bracket takes 3 sets of the nutserts and the 45 degree gussets take 4 sets. You should slide 7 nutserts into each channel in the bottom of the gantry. The additional 8 nutserts will be used for the side plate reinforcement brackets. Once you have the nutserts into the gantry, install the 45 degree gussets, loosely. These need to be able to move enough to line up the 4 bolts to the side plates. THEN lift the gantry up to the side plates and install the 1.75” long 5/16 bolts with nylocs, 4 on each side plate. I didn’t do it this way; I wish I had. It seems much more soothing and calming than the 3 steps back to 1 step forward approach that I took.
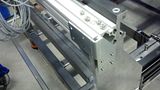
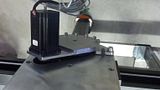
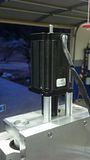
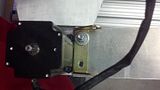
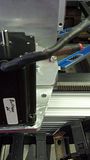
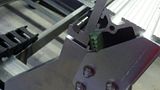
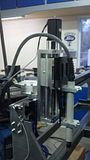
Apocalypse Fabrication My gantry beam hung over the edge of my side plates about 5/16”, so the reinforcing brackets would not work without shimming. Today I am going to bring home some washers and longer bolts to make this work correctly. I am also going to make some cable carrier brackets. Why aren’t these included? Seems that every other bracket was there.... Since I didn’t have the cable carrier brackets made. We had to stop with the instructions at this point. I looked over at the bench with all the parts and wondered… “hrm, don’t these motors and z axis need to go on?” I scoured the instructions and found nothing about their mounting. The following pictures are just me guessing where things go and bolting them up loosely in case I got it wrong. I was missing to the nyloc nuts for mounting the z axis. I stole some off of the side motors for right now. The magnetic torch mount was pretty straight forward, just lined up the locating dowels and watch your fingers! The motor for the z axis used the 4 black allen screws, the aluminum standoffs and the shaft connector (which looked like a rubber Lovejoy coupler, if you know what those are). Loosen the allen binding screws and slip/force it on to the motor and the z axis screw. Then install the black allen screws and standoffs. The machining looked like the outside holes were a little thin… be careful on torqueing those down. Is there a reason why there couldn’t be an 1/8” more material there? I really hope my instructions and pictures help others in the future. I will be sending my therapy bills to Matt@ Bulltear! 😛 My current status:
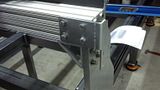
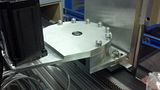
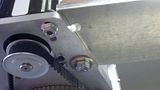
Apocalypse Fabrication jeepsr4ever;132522 wroteYou can absolutely post up. Just a couple quick things we do before items ship and also some info The magnetic plate is set to your Z axis and does not need anything special to setup. The unimount torch mount allows the use of .9-1.5" diameter torches. A 5/16-18 bolt holds in the smaller diameter. The motor mounts are attached one way and there is a left and right. You will note the slot configuration. Attaching the motors can be a little tricky because one side uses a square nut and a slot for retention and the other side uses a flange nut. There are 2 different length socket head capscrews and they are assembled on the reduction units. When you buy a gantry kit the motors are usually not attached to the reduction units and require you to take loose the socket head capscrews and attach the motors. Taking it all apart can make assembly a little tougher. We used to install the Z axis motor however we found that the assembly is very long to ship. 1. I got the magnetic torch mount figured out... 2. & 3. I think the reduction units (belt drives) were already installed on my motor plates... Can you verify from the pics that they are correct? I did not see any flange nuts just the nylocs. The pictures should show what I have. What do I do about gear contact? I assume the gears should be meshed fully, but is there a specified amount of preload I should put into the gears before fully tightening the nylocs? What should they be torqued to? Side question: How the hell do you torque the bolts in the 45 degree gusset to 25 ft lbs? I can barely fit a wrench on the inside bolts, let alone a socket.
jeepsr4ever Gear contact should be listed in the instructional. It looks like we have a page missing from the instructional. You want 5-15lbs of force into the gear rack. Watch as you dont allow two teeth to ride on each other or one side wont drive. Once your all hooked up power the drive unit up and wiggle the side plates and Y axis. You should get no play if you do there is slop in the gear rack or your set screws arent tight on the motor shaft.
jeepsr4ever Apocalypse Fabrication;132528 wrote1. I got the magnetic torch mount figured out... & 3. I think the reduction units (belt drives) were already installed on my motor plates... Can you verify from the pics that they are correct? Yes they look correct I did not see any flange nuts just the nylocs. Right, then your motor assemblies came fully assembled. The pictures should show what I have. What do I do about gear contact? I assume the gears should be meshed fully, but is there a specified amount of preload I should put into the gears before fully tightening the nylocs? What should they be torqued to? Side question: How the hell do you torque the bolts in the 45 degree gusset to 25 ft lbs? I can barely fit a wrench on the inside bolts, let alone a socket."Barely" and "can" are sometimes the same thing 🙂 You will need to tighten those corner bolts with the open end wrench on the bottom bolts (of the gantry) and a socket on one side and a open end wrench on the sideplate upper bolts. That help?
Apocalypse Fabrication jeepsr4ever;132530 wroteThat help? That is exactly what I did... but with an open end wrench... feeling for 25 ft lbs is inaccurate, at best.
Apocalypse Fabrication I was just thinking... It's probably a good idea to use Never Sieze or Blue Loctite on all the threaded connections between steel in aluminum. I guess I will have to do that too. I've got previous experience with steel bolts in aluminum heads... not good without thread sealant.
Apocalypse Fabrication Matt: What size are the nylocs for mounting the z axis... I didnt measure before I left. 9/16 socket to tighten, so I am thinking 3/8 fine thread nuts? Another question: The cable carrier came in one piece. At what measurements should I break it to make the x axis and y axis lengths?
jeepsr4ever :) If you are up against a wall call in we have a couple guys here that know every single bolt on these kits and they build the tables.
Apocalypse Fabrication I ask here on the thread for two reasons: I have the answer and other people will have it in the future if they have the same problem. Thanks for the quick feedback!
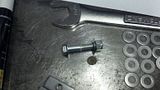
Apocalypse Fabrication Ok, back from the hardware store on my lunch break... ROFL, that place is always a joke They dont have stainless locknuts in fine thread, of course. The plated steel ones I got were 47 cents a piece. Tell the crate packing guys I will be sending them an invoice! :P
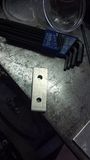
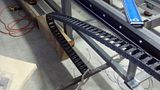
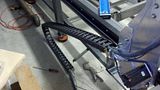
Apocalypse Fabrication Got some gantry cable carrier brackets cut out... they arent pretty, but I think theyll work. Need to look tonight and figure out a system for the y axis cable carrier
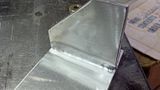
Apocalypse Fabrication Got a couple of aluminum pieces cut 3x9 to make aluminum angle for the upper y axis cable carrier mount... All I have is a small scrap of 1/4" aluminum sheet, so I am trying to make do without having to go to the metal supplier in Fresno and get a piece of aluminum angle. I'll fire up the Dynasty and see if I can weld these pieces together. Ive never done aluminum, and I dont have any filler (also in Fresno... 35 minutes away). Hopefully I can fusion weld it and it will hold. We will see...
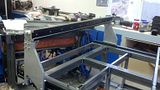
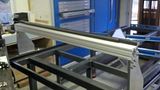
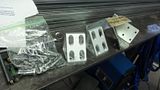
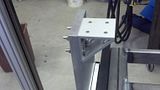
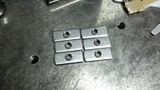
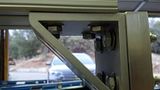
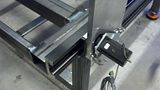
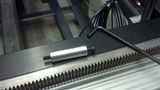
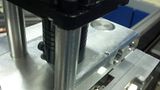
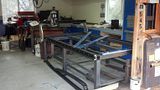
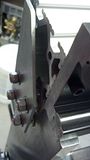
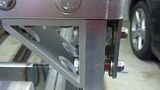
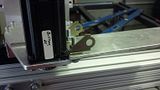
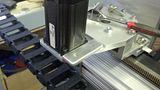
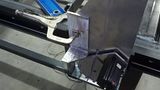
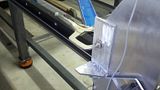
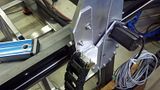
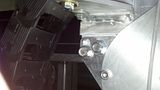
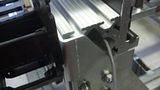
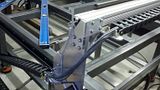
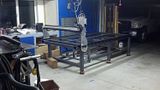
Apocalypse Fabrication This weekend's progress: First, I needed to get the side plates shimmed and mounted with the reinforcement brackets. I measured and found that I needed .404 spacing on each side. I could have waited and made some bushings out of pipe, but I was trying to get this done. I put the longer 2" bolts in, a washer under the head of the bolt, a washer on the other side of the side plate, a nut, a washer, the reinforcement bracket, and then another washer and nut. It seemed to space it out enough to clear the bend in the bracket and everything lined up. BTW... this wrench was the KEY for tightening all the bolts inside that stupid 90 degree gusset. It is a thin profile 1/2" wrench. The fullsize wrenches were all camming off the bolt head when tightened. Installed the carrier pieces I had made previously for the gantry chain: Mocking up the carrier end mounting plate for the gantry chain, I had to remove the x axis motor: Bolted it together for mockup: Carrier end mounting plate made from .25 aluminum: Here is a pic of the topside of the gantry carrier end mounted. Just a little bit more meat on this motor bracket would have made life SO much easier:
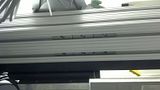
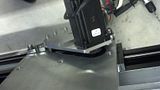
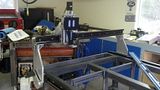
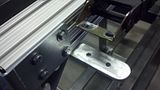
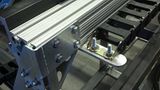
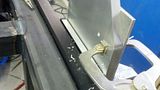
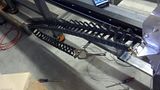
Apocalypse Fabrication Here is a pic of the underside of the x axis motor and where the bolt and clearance required to mount the cable carrier end. Pic of the completed gantry carrier mounting overall: My first aluminum welding... used it for the Y axis bracket. It definitely isnt pretty, but it should hold this... I think >< Drilling the holes through the side plate for the upper Y axis carrier end bracket: Topside of the Y axis carrier end mounting: Here is an underside pic of the Y axis carrier end mounting. This is a mockup pic of the lower mounting of the y axis carrier chain... I still dont know what I am going to do here. I may cut a gusseted bracket out when the table is up and running! I ran the wire for the motor opposite the carrier chain side through the extruded aluminum channel for the gantry:
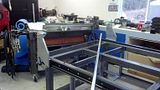
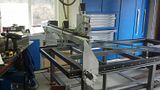
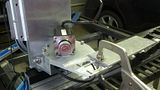
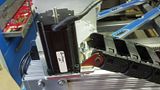
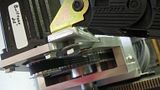
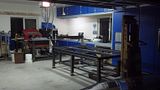
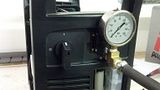
Apocalypse Fabrication Cable carriers opened to accept the wiring and torch lead: Cable carriers with the mechanical torch and wires ran: Some overall pics taken when I was cleaning: I also managed to do the RS485 port upgrade on the Hypertherm 65. Matt... when will Bulltear be supporting this new feature? I am sure I will want it running after I get the bugs worked out on the table.