USE THIS INFO ONLY ON 2011 AND EARLIER MODELS
We have had a couple of inquiries as to how fast you can go from 0-100 with the system we offer. If you ordered a gantry kit or a complete table and are setting up software please follow these instructions.
- Setup Mach3 using the MP3000 as the primary profile and not the general buttons (Mill, Plasma, Turn, EMD...ect). Load MP3000 after loading your liscense for Mach 3 (file is on your support disk)
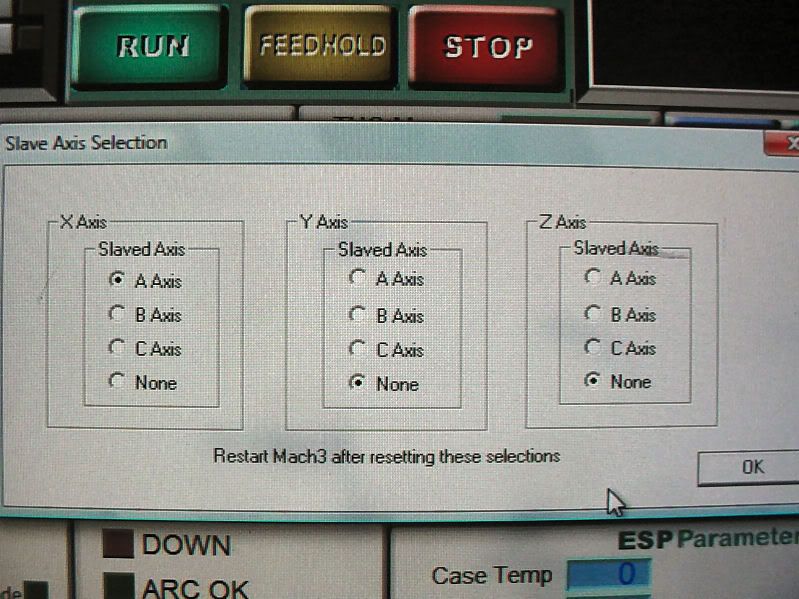
- Go into your Mach3 once you are running the DTHC3000 profile and go to your config tab. Because we use a dual drive zero backlash system you want to slave an axis. Some will slave X and A and some will slave Y and A depending on which cables are hooked up. For this example lets slave X and A. Remember to save you settings.
- Now lets go to config and motor tuning. Bulltear tables use a very smooth gear on all axis but not the same size gear or pitch on all axis. For X,Y,A axis the following is used.
1019.1 Steps
1000 Velocity (V can be 1-1000)
30 Accel (accel can be 1-50)
Z axis (torch up and down)
1273.9 Steps (24000 Steps NEW Z AXIS with screw)
50 Velocity
20 Accel
This gives you very accurate movements of .001" (2,754,000 points on a 4x4 table, actual travel 54x51 or 5,200,000 points on a 4x8 table, actual travel 104x50)
You will get a copy of Sheetcam you can use for many projects. To use Sheetcam you fist must liscense the software. Located and click the help button and install liscense file. Locate the liscense on your support disk and install. Sheetcam may propt you to restart Sheetcam. Once restarted click help again and go through the setup wizard.
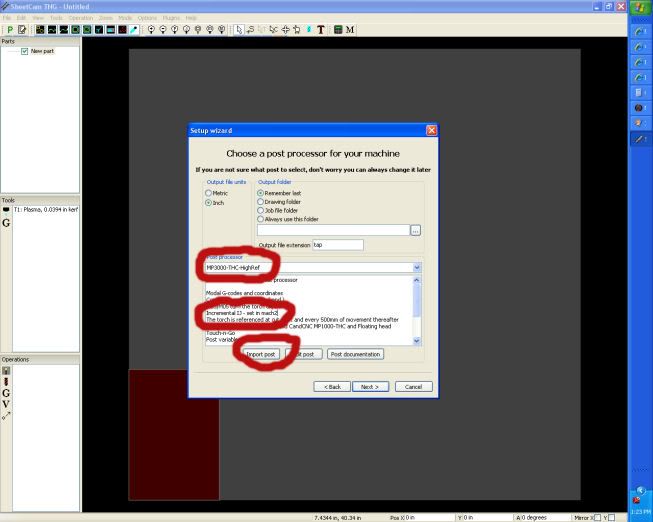
The setup wizard will bring you to the post screen from here we want to import post. The post you want for this setup is the MP3000hi-ref.post. Click to import.
Note that it will say incremental and we will change a feature in Mach 3.
**NOTE The post can be modified to not allow the X zero Y zero movement after a cut. This is done by opening the setup wizard and at the post screen click edit post and locate the end sequence and delete X 0 and Y 0 and save.
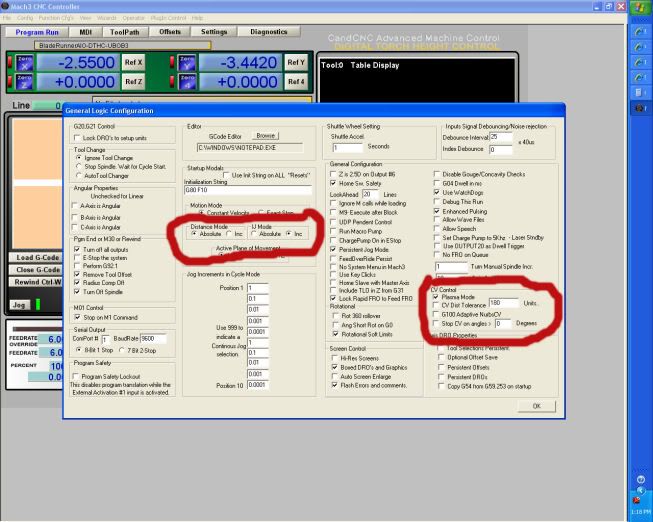
Now that Sheetcam is all setup we want to make sure Mach 3 has noted the changes. Open the config tab and click general config. We want to set this up for plasma cutting so check that box and then make sure I,J mode is set to Incremental.
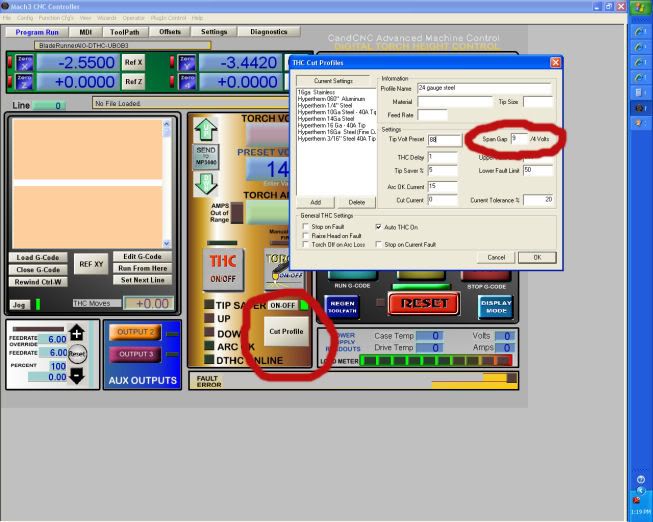
- You can also get VERY smooth DTHC cuts by clicking the cut profile button in Mach 3 and changing the voltage change. 1/4 volt = 1. Note we have 9 in the box, this makes DTHC less sensitive. 1-10 is the amount of adjustability you will have.
***TIP, for some thin materials like 26 gauge a value of 10 may be used. This is for 300+IPM cutting.
SETTING Z LIMIT SWITCH FOR TOUCH AND GO CUTTING
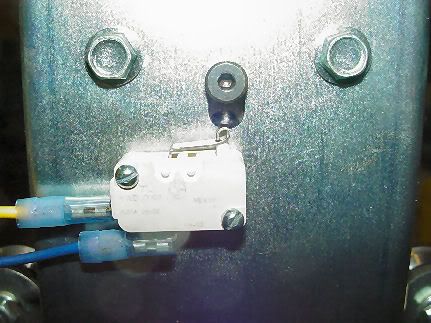
- Shown here is the Z axis you want to mount your switch so when the you push the Z axis up from the base the head of the machine bolt hits the switch (not crushes the switch).
NOTE THE SWITCH TO Z AXIS BOLT HEAD (fig. 1)
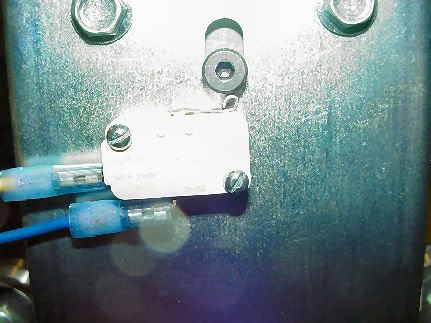
HERE SWITCH HAS BEEN TRIGGERED BY Z AXIS (fig. 2)
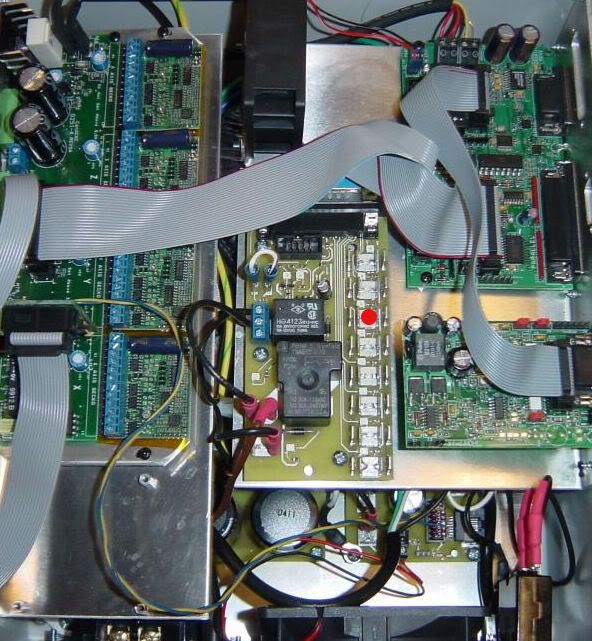
- Next run your wires with your axis motor cables. These two leads must be plugged into the tabel I/O card located in the big control box.
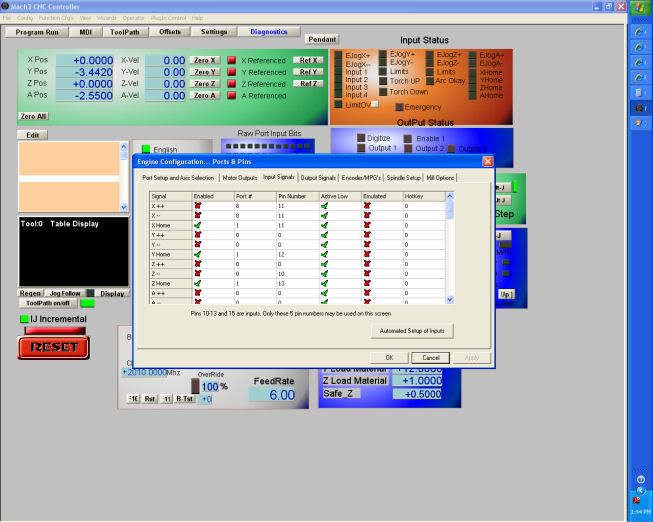
YOU MUST ACTIVATE Z AXIS HOME SWITCH IN MACH 3 FOR DTHC TO WORK. UNDER PORTS AND PIN IN THE CONFIG TAB. MAKE SURE Z HOME IS ACTIVATE AND TEST Z AXIS LIMIT SWITCH
We want to make sure you have the right limit switch hooked up so lets open Mach 3 and click the diagnostics tab. Click your limit switch and make sure Z axis home lights up yellow.
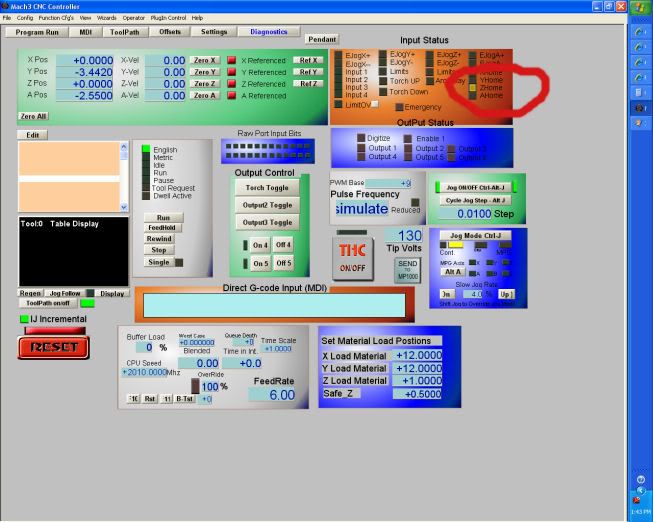
IF Z HOME DOES NOT LIGHT UP OR ANY OTHER LIGHT DOES NOT COME ON YOU WILL NEED TO FIND THE RIGHT Z TERMINALS
If another home lights up then you can either put the Z home wires on another terminal or go into this screen and change the Z home to the right port and pin to allow Z to become active. Go back to diagnostics to verify.
Your set!